Software Update Information and Instructions for SPX Autopilots
This software update FAQ relates to the following products:
- i70s
- p70s
- ACU
- EV-100
- STng Converter
- AIS700
If you have performed the a, c, e, eS, gS or AXIOM Series MFD update recently you may not need to perform this update. Please check your device software.
PLEASE READ
Please fully read this page before attempting to update your Raymarine System. This page contains each step for you to sucessfully update your Raymarine system
IMPORTANT TERMS OF DOWNLOADING SOFTWARE
Firmware update processes are done at your own risk. Before initiating the update process be sure to backup and make copies of all important files.
If the firmware process is interrupted your product may not function properly, therefore do not interrupt the process and ensure the unit is on a reliable power supply. Damage caused by incomplete upgrades will not be covered by Raymarine warranty.
By Downloading the software, you agree to these terms.
Stage 1: Populating the mSD Flash Memory Card (or CF Card) with the MFD Software
Note: To avoid potentially corrupting the data on your Navionics chart card, DO NOT copy software update files to your Navionics chart card and DO NOT back up waypoint/route/track data to your Navionics chart card. MicroSD cards are commonly available in most stores selling consumer electronics products. Waypoint, route, track data, and system configuration data can be stored on a microSD memory card which also contains software update files.
- You are NOT required to update the products software versions sequentially. For example, you can go from application v1.04 to v1.35, however you may require a bootcode upgrade first.
- The mSD (Micro SD) memory cards used with a/c/e/eS/gS Series MFDs should have a memory capacity of no less than 1GB and no more than 32GB.
- The mSD card should be formatted to FAT32. (External link: Instructions)
- Insert a compatible Flash memory card into the computer's memory card reader or into a memory card reader which has been interfaced to the computer.
- Select the appropriate software download for your product
- Upon completion of the download, click on the "Downloads folder" (or the folder where your Internet Browser has been directed to save downloaded files), to open it
- If the downloaded file is a .ZIP file, extract the contents of the .zip file - (if it is an .ISO file, go to STEP 6) Note: Only unzip the main ZIP file that is downloaded. Do not attempt to open the files contained within the ZIP file as these may have extensions such as .dob .pkg .sh .sh.sig .iso or .zip with various file names. If you attempt to open these files you may see an error as they are designed to update your Raymarine products and not for use in a Windows, Apple or Linux PC.
- Copy the contents of the main zip file to the Root of the Flash card (Root is the first level you access when selecting the Flash).
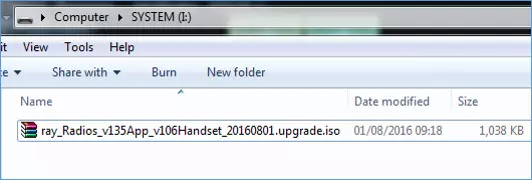
- If the Download is an ISO file, do not try to open the file. Instead just copy the whole ISO file over to the root of the mSD card.
- Note: Some products may have both a Bootloader and an Application ISO file (such as the VHF Radios). Do not copy these onto the same mSD card at the same time, otherwise the upgrade will not work. The Bootloader ISO must be on a seperate uSD card. Please review the Radio Upgrade instructions for further information.
- Important: Make sure the files are not in any folders on the card
- For example: if your computer has assigned Removable Disk (E:) to your memory card reader/writer, then the software update files should be copied directly to Removable Disk (E:), not to any folders created on the memory card.
- Remove the memory card from the computer's memory card reader.
Stage 2: The update method
Information about the a, c, e, eS, gS and AXIOM Series update using ISO files
The a, c, e, eS, gS-Series software download or AXIOM Series software download, now contains the latest version of software for the following peripherals:
- Adaptors – ST1-STNG Converter, ECI-100, iTC-5
- AIS - AIS700
- Fishfinders – CP100, CP200, CP370, CP470, CP570, RVX1000
- GPS - RS130, RS150
- Instruments – i50, i60, i70, iTC-5, p70
- Pilots – Evolution ACU, Evolution EV-1, p70, p70R
- RMK-9 / RMK-10
- Radar - Quantum, Magnum
- VHF - Ray50, Ray60, Ray70 (not the 2nd Station Handset)
These are grouped together as ISO files
Once the Master MFD has been updated, usually any connected MFD or peripheral will be updated as well.
If you have performed the update recently on the MFD, you may not need to perform this update. Please check if you require the update.
Updating the Product using a, c, e, eS, gS or AXIOM Series MFD's using ISO files
- Please make sure that the product to be upgraded, and the MASTER Multifunction Display (MFD) have both been interfaced to one another via a powered and properly terminated SeaTalkNG backbone, that the Product and MASTER MFD have been powered ON, and have completed startup initialization before starting the update procedure.
- Note, if upgrading an ECI-100, the Engine side (Devicenet side) of the product has to have power connected to it as well.
- Place the mSD card with the ISO file product software into the Master MFD (while it is powered on)
- If you are not presented with a pop-up box within a short period of time, then enter the following menu:
- From the Home Screen, press Set-Up > Maintenance > Check Card for updates
- Follow the on screen instructions until you are presented with a table of connected products
- Ensure that the product/s you wish to update are ticked (i.e. the ST1 to STng converter needs to be ticked)
- Click on the Install now button located in the bottom right corner of the screen.
- MFD will show update % progress and eventually "Upgrade Complete" for the product/s
- Once all products have completed, remove the mSD card from the MFD and Power Cycle the system.
- Finally, please verify that all software is now up to date by going to the "checking the software versions..." section below:
Checking the software versions of your Raymarine products using a, c, e, eS or gS Series MFD
- The MFD's and peripherals software version may be verified via the command sequence:
- [Home screen] Setup > Maintenance > Diagnostics > Select Device
Please note: You will only see Raymarine devices that are connected on SeaTalkNG and RayNet only. Other devices may not be listed
Updating the Product with a Legacy display (A Series Classic, E Series Classic, C Series Wide, E Series Wide, G Series) or an a/c/e/eS/gS MFD using PKG files
- Power OFF the MASTER MFD.
- Please make sure that the Product to be upgraded, and the MASTER Multifunction Display (MFD) have both been interfaced to one another via a powered and properly terminated SeaTalkNG backbone, that the Product to be upgraded is powered ON, and has completed startup initialization before starting the update procedure.
- Note, if upgrading an ECI-100, the Engine side (Devicenet side) of the product has to have power connected to it as well.
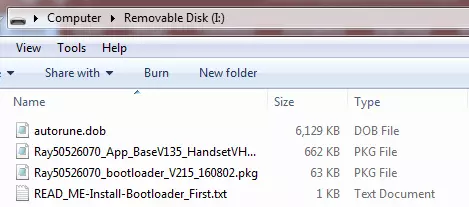
- Insert the memory card containing the PKG product software update file, and the relevant Autorun file/s into the MASTER MFD’s memory card reader.
- All PKG and Autorun files must be in the root of the Memory card, not within a Folder or Zip file.
- Power ON the MASTER MFD.
- After the MFD has booted to its Raymarine Software Upgrade Utility screen, select the software upgrade package from the Upgrade Packages Available list.
- Press the UPGRADE REMOTE UNIT function key.
- Press the UPGRADE REMOTE UNIT ON ST2 (It may also say STNG depending on the current version of software you are using).
- Use the Trackpad to highlight the unit you wish to update and press the UPGRADE UNIT softkey.
- Note, If the RS130 is not listed then try power cycling the RS130 off and on again (turning the SeaTalk1 or SeaTalkNG power off/on). Try this 3-4 times to see if communication can be obtained and you see the RS130 appear. Then select the RS130 in the list to be upgraded.
- When the progress indicator's Overall bar reaches 100%, the Device's software will have been upgraded.
- Remove the CF memory card from the MFD's memory card reader.
- If you have just upgraded your RS130 bootloader or VHF Radio bootloader, then you will need to upgrade the Application to restore operation.
- Once bootloader has been loaded, follow steps 1-10 above to load in the application for the product, then progress to step 12 below.
- Power cycle the whole system.